Miniature Life Tutorial
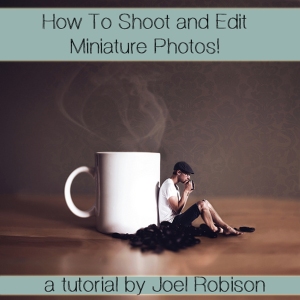
In the past few months I’ve received quite a few requests and questions around creating a tutorial for how I do photos like these, making myself miniature! I’ve been meaning to write a tutorial for how I achieve this look but haven’t had much time to sit and write one out, until now!
I’ll break the tutorial down into two parts, shooting the actual images and then editing them.
Shooting The Photos!
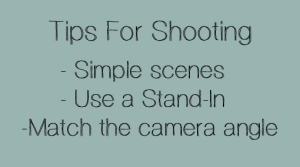
The first thing I always try to before I take any photo but especially these miniature ones, is make sure that I have a solid concept and an idea of any props or supplies I might need. The more prepared you are for shooting, the easier the entire process becomes. From my experience, shooting miniature scenes works best with simple backgrounds like walls, windows, or lush forest areas. If you have a busy background, even one with a lot of bokeh it can be difficult to make the images match in lighting.
Once you have your concept and your location it’s time to shoot. Here is where you really have to put yourself into tiny shoes and imagine what the scene would look like if you were only an inch tall. I think one of the ways to make these photos look as realistic as possible is to have the focussing and DOF spot on. To do this, you don’t want to just take a photo of an empty scene, you want to have a stand-in for yourself or your model so that the focus is accurate and appropriate to the scene you’re trying to create. I usually use this guy:
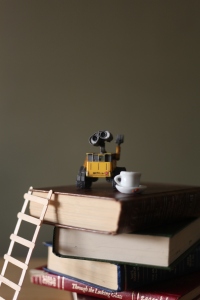
This Wall-e figure is a great stand-in, it allows me to set the focus on where I will be layering in my own image or the image of someone else and it also gives me the opportunity to use shadows. Shadows and reflections are some of the smaller details that really help to build up an image and by using a toy stand in (lego figures would work too) it allows you to not only set up your focus and scene but also keep and use the shadows that the toy casts.
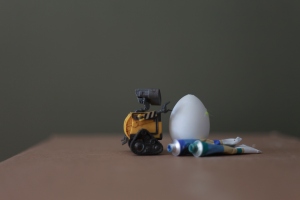
After you’ve set up your stand-in and you have the focus where you want it, lock the focus. Take a few shots with your stand-in and then remove it to get some photos of what we’ll call the “blank scene”. This is where you can get creative, you can do an expansion if you like or keep it to one shot. You can start to add in new elements (dropping coffee beans) or you can leave it simple.
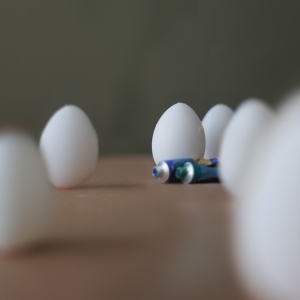
Blank Scene
Once you’ve finished with your blank scene it’s time to take the portrait side of the image. This is where things get a bit more particular. I always try to shoot everything in the same time frame and in the same location as possible so that the lighting and colouring looks as similar as can be. What I tend to do is look back into the first few images of my stand-in to see where my pose should be but more importantly where the camera angle should be. If you’re shooting the miniature at floor level, it means that you might have to sit on a chair or get your camera lower to make sure the angle and shadowing is similar. This is where you can go a little crazy with the photos, take more than you think you need to and check your results often so that you can adjust pose or angle if you need to. After you’re happy with the images, it’s on to editing!
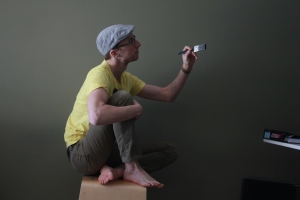
Editing!
The first thing I always do is open up my blank scene photos and expand them (if you’re not doing an expansion, skip this part!) I usually include a layer using my stand in, just in case I need to use the shadows later on. If you’re not familiar with how expansions work, I do have a tutorial here that explains it! https://joelrobisonphoto.wordpress.com/2012/04/13/an-expansion-tutorial/
After you’ve set up your blank scene, it’s time to add in your Mini. Depending on the images, it can be as simple as layering the mini images in and simply masking out the parts you don’t want but usually it involves resizing the “mini” layer to fit the scene.
Resizing the “mini” layer is where things can get tricky. You have to keep in mind the original scene that you set up, how tall was your stand in and what is the focus set to? If you shrink yourself too small or not enough, it sets everything slightly off. So, using a lot of trial and error simply resize this “mini” layer. I usually mask the layer roughly first just to get the sizing right and then do a clean up after I’m happy with it.
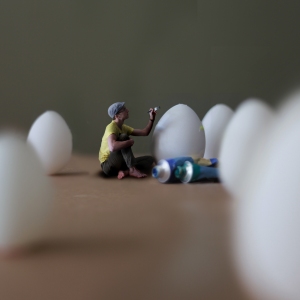
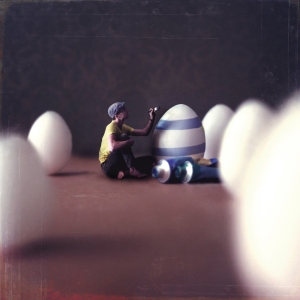
So now you should have the basis of a “mini” shot! This is where those finer details come into play. In the shot below, I knew I would need to have a shadow of my arm and hand over the egg, so using the layer with Wall-e I copied his shadow and layered it into the image. I also knew that there’d be some more shadows needed around my feet and legs so using the burn tool I lightly burned the area to darken the shadows. Sometimes I also use the soften brush on a low opacity to add some DOF to the “mini” layer, this is helpful to give some realistic DOF. Just by doing a very subtle soften of shoulders, knees or other body parts that are a bit further away from the camera it helps to give a more cohesive and finalized look to the mini layer.
If you’re unsure of shadows or reflections, just return back to your stand-in shot to see where things should be and if you need to add in any final details. Once you’ve finished with the smaller details, you can continue to edit the colour tones, curves, textures etc of the image all at once!
